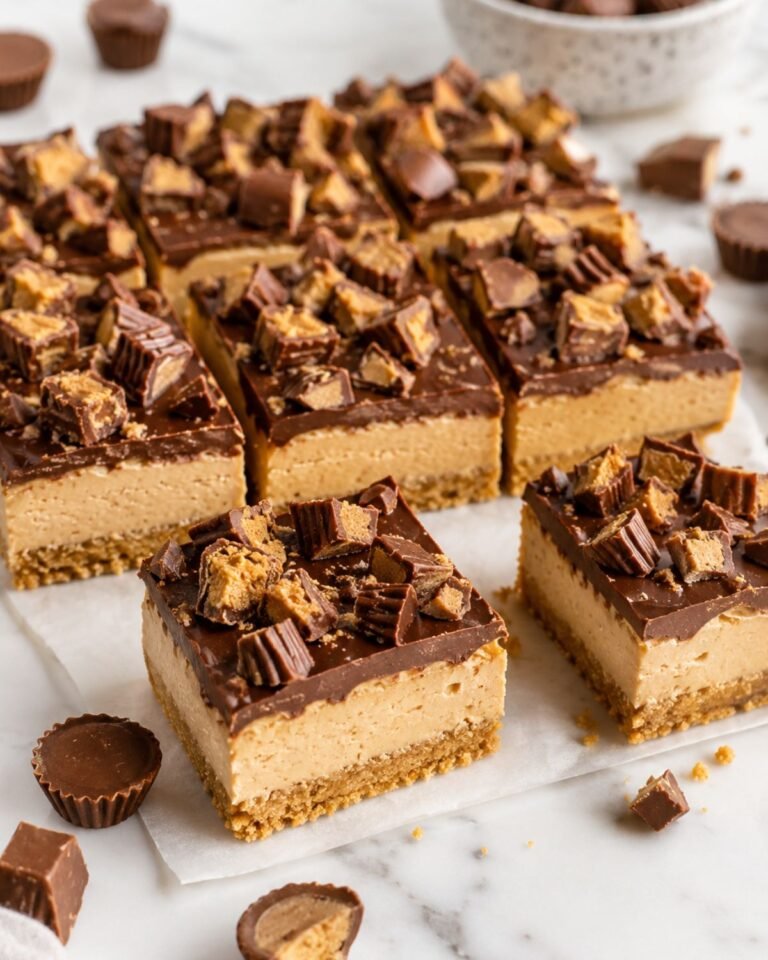
No-Bake Chocolate Peanut Butter Bars (Easy & Fudgy Recipe)
Some desserts feel like a project. These bars are the opposite. No-bake chocolate peanut butter bars come together with simple pantry ingredients, no oven, and very little effort, yet they still feel rich enough to satisfy a real dessert craving.
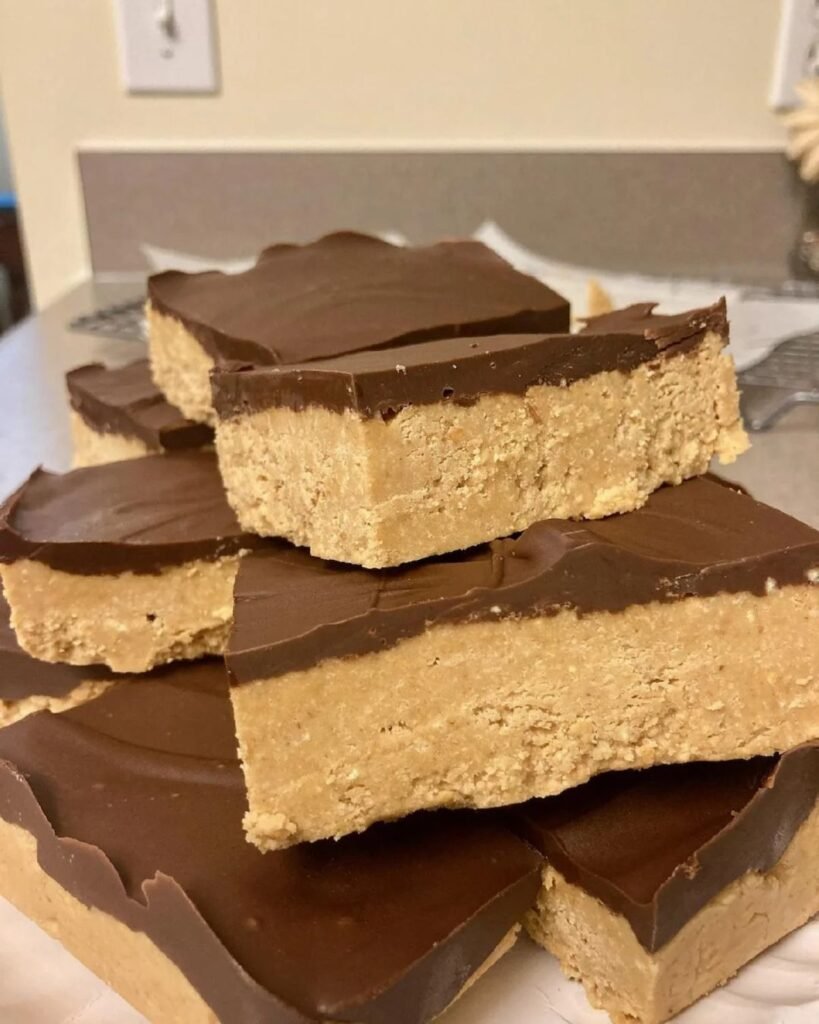
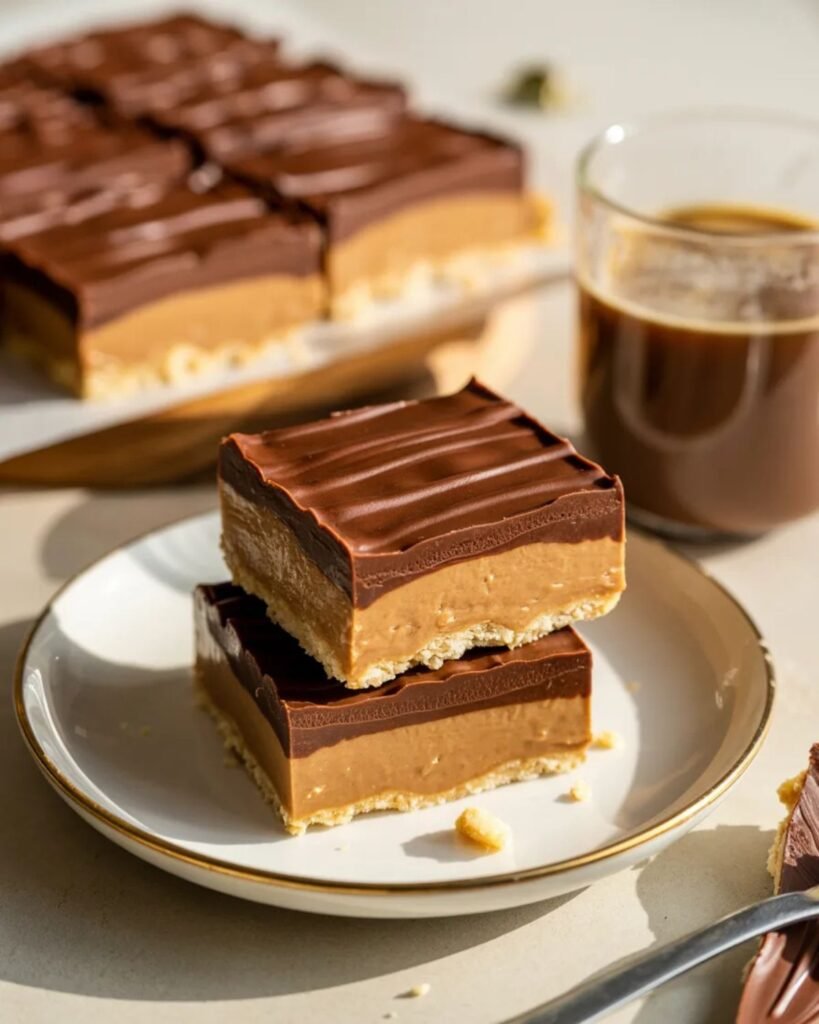
Photo : r/food
There’s something especially nice about recipes like this on days when you want something homemade but don’t want to bake. You mix a soft peanut butter base, spread a layer of melted chocolate on top, chill it, and suddenly you have neat little bars that taste like a cross between peanut butter cups and fudge.
What makes this recipe so reliable is how uncomplicated it is. The ingredients are familiar, the steps are easy, and the result is consistently good. If you like quick desserts, chocolate peanut butter treats, or easy no-bake recipes, this is the kind of one you’ll probably make more than once.
Quick Overview
Prep Time: 15 minutes
Chill Time: 1–2 hours
Total Time: About 1 hour 15 minutes
Servings: 16 bars
Perfect for:
• quick desserts
• no-bake treats
• holiday trays
• afternoon snacks
• easy make-ahead sweets
Because these bars need chilling instead of baking, they’re especially useful in warm months or on busy days when you don’t want to turn on the oven.
Why This No-Bake Chocolate Peanut Butter Bars Recipe Works
This recipe works because it keeps the structure simple and the flavors balanced. The base is soft, slightly sweet, and rich with peanut butter flavor. The top layer adds a smooth chocolate finish that firms up beautifully in the fridge.
A good no-bake dessert usually depends on texture just as much as flavor. If the base is too dry, the bars crumble. If the chocolate layer is too thick or too hard, slicing becomes difficult. This version is designed to stay firm enough to cut while still feeling soft and fudgy when you bite into it.
Another reason it works so well is the classic chocolate and peanut butter combination. That pairing has been popular for years because it naturally balances sweet, salty, creamy, and rich flavors in one bite.
These bars also store well, which makes them ideal for meal prep desserts, party trays, or make-ahead treats when you want something ready in the fridge.
Ingredients
You only need a few basic ingredients to make these easy no-bake chocolate peanut butter bars.

Peanut Butter Base
1 cup melted butter
2 cups graham cracker crumbs
1 cup peanut butter
2 cups powdered sugar
Chocolate Topping
1½ cups chocolate chips
¼ cup peanut butter
That’s the full recipe. A small ingredient list is part of the appeal here.
Choosing the Best Peanut Butter
Peanut butter is one of the main flavors in this recipe, so the type you use matters.
Creamy Peanut Butter
Creamy peanut butter is the easiest and most reliable option. It mixes smoothly into both the base and the topping, which helps create that soft, even texture these bars are known for.
Natural Peanut Butter
Natural peanut butter can work, but it may create a slightly softer or oilier base depending on the brand. If you use it, stir it very well before measuring so the oil is fully incorporated.
Crunchy Peanut Butter
Crunchy peanut butter adds texture, but it changes the classic smooth bite of the bars. Some people enjoy that extra crunch, though creamy peanut butter is still the better choice if you want a more traditional result.
If your goal is a soft, rich, bakery-style texture, creamy peanut butter is the safest option.
Choosing the Best Chocolate
Chocolate is the second major flavor, so it’s worth choosing one you really like.
Semi-Sweet Chocolate Chips
Semi-sweet chocolate is the classic choice. It balances the sweetness of the peanut butter layer without making the bars taste too sugary.
Milk Chocolate Chips
Milk chocolate creates a sweeter, softer flavor. This works well if you want the bars to taste more like candy.
Dark Chocolate
Dark chocolate adds more contrast and slightly less sweetness. If you prefer richer desserts, this is a great option.
A lot depends on personal preference, but semi-sweet chocolate tends to be the most balanced for this type of recipe.
Step-by-Step: How to Make No-Bake Chocolate Peanut Butter Bars
Step 1: Prepare the Pan
Line an 8×8-inch baking pan with parchment paper.
This helps in two ways. First, it keeps the bars from sticking. Second, it makes lifting the chilled bars out of the pan much easier later.
A lined pan is a small step, but it saves frustration when it’s time to slice.
Step 2: Make the Peanut Butter Base
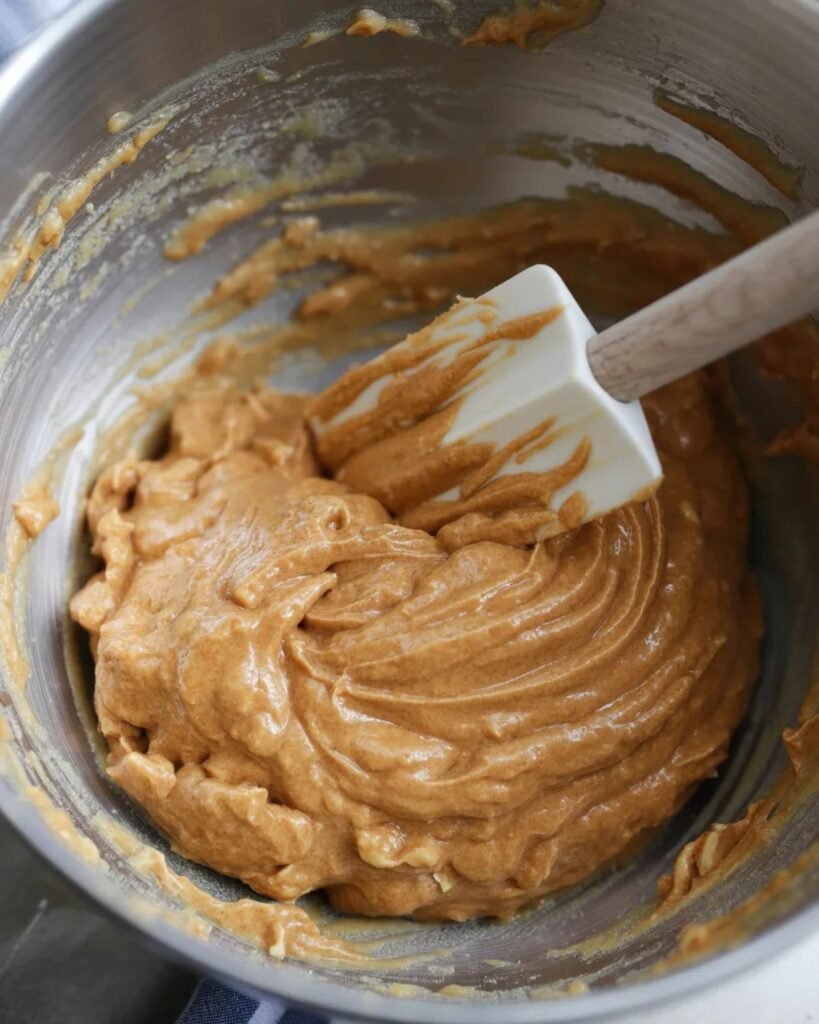
In a large bowl, combine the melted butter, graham cracker crumbs, peanut butter, and powdered sugar.
Mix until the ingredients come together into a thick, soft mixture.
At first, it may look slightly crumbly. Keep mixing. It should eventually resemble a soft dough that holds together when pressed.
This is the base of the bars, so take a moment to make sure everything is evenly combined.
Step 3: Press the Base into the Pan
Transfer the peanut butter mixture to the prepared pan.
Press it down firmly into an even layer.
Using the back of a spoon, an offset spatula, or even clean hands can help smooth the top. Try to get the surface as level as possible so the chocolate topping spreads evenly.
This step matters more than it seems. A firm, even base makes the final bars neater and easier to cut.
Step 4: Melt the Chocolate Topping
In a microwave-safe bowl, combine the chocolate chips and ¼ cup peanut butter.
Heat in short intervals, stirring between each one, until the mixture is smooth and glossy.
You can also melt it gently over a double boiler if you prefer.
The peanut butter in the topping keeps the chocolate from becoming too hard once chilled. That’s what helps create clean slices later.
Step 5: Spread the Chocolate Layer
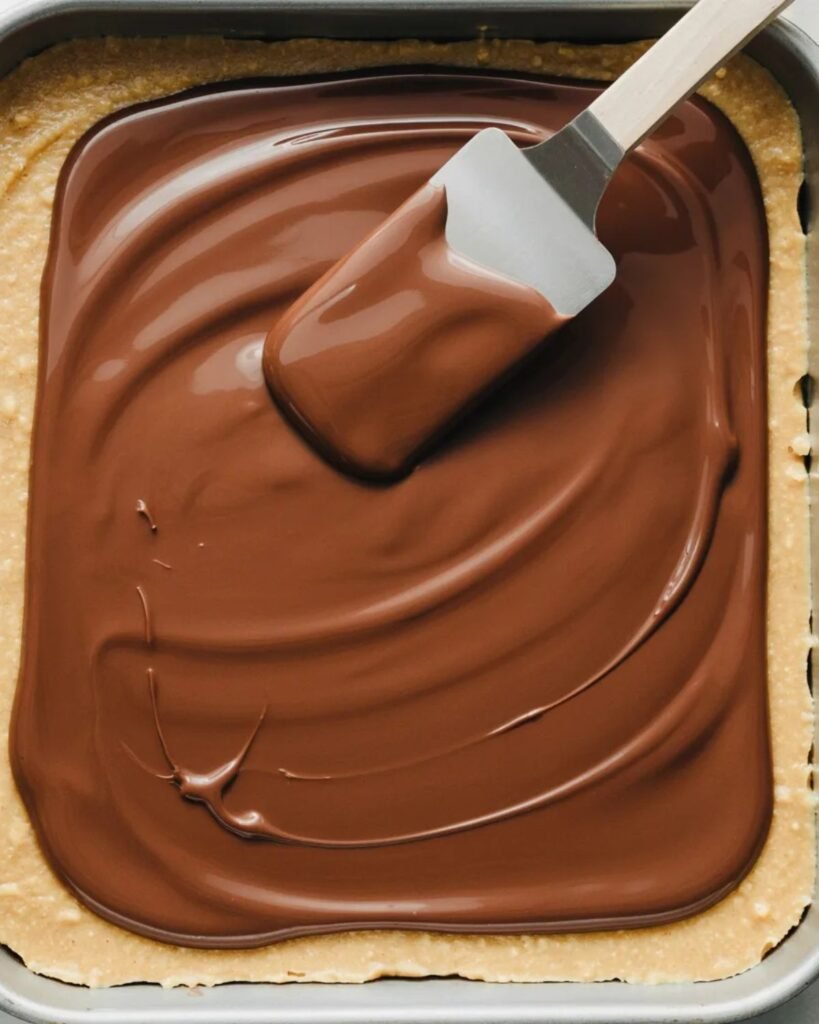
Pour the melted chocolate mixture over the peanut butter base.
Spread it gently into an even layer.
Try not to press too hard, especially if the base is soft. A light hand works best here.
Once the top is smooth, the bars already start to look like a real dessert rather than a bowl of pantry ingredients. That’s one of the satisfying parts of making them.
Step 6: Chill Until Firm
Place the pan in the refrigerator for at least 1–2 hours.
The bars should feel firm enough to slice cleanly before you remove them from the pan.
If you’re in a hurry, you can chill them a bit faster in the freezer, but the refrigerator usually gives a more even texture.
Step 7: Slice and Serve
Once fully chilled, lift the bars out of the pan using the parchment paper.
Slice into squares or rectangles.
For the cleanest cuts, use a sharp knife and wipe it between slices if needed.
Serve chilled or let them sit at room temperature for a few minutes if you prefer a softer bite.
Tips for the Best No-Bake Chocolate Peanut Butter Bars
A few small details make a noticeable difference with this recipe.
Use Finely Crushed Graham Cracker Crumbs
Smaller crumbs create a smoother, more even base. Large chunks can make the bars feel rougher and harder to press together.
Press the Base Firmly
If the base is loosely packed, the bars may crumble when sliced. A firm press helps everything hold together better.
Don’t Overheat the Chocolate
Chocolate chips melt best with gentle heat. If they overheat, they can become thick or grainy instead of smooth.
Chill Fully Before Cutting
This is one of the biggest keys to success. If you cut too early, the layers can slide or smear.
Add a Small Amount of Peanut Butter to the Chocolate Layer
This makes the topping softer and easier to slice. Without it, the chocolate can harden too much in the refrigerator.
These are small adjustments, but together they help the bars feel much more polished.
Common Mistakes to Avoid
No-bake desserts are usually simple, but they still have a few common trouble spots.
Using Too Much Powdered Sugar
It can be tempting to add extra sugar if the base feels soft, but too much makes the bars dense and overly sweet. Stick close to the recipe.
Not Mixing the Base Enough
If the butter and peanut butter aren’t fully distributed, some areas may feel dry while others turn greasy.
Making the Chocolate Layer Too Thick
A very thick top layer can overpower the base and make cutting harder. Keep the proportions balanced.
Chilling for Too Little Time
This is probably the most common mistake. If the bars haven’t fully set, they won’t slice neatly.
Cutting Straight From a Hard Freeze
If the bars are extremely cold, the chocolate top can crack. Let them sit for a few minutes before slicing if needed.
I’ve had that happen before with chilled desserts that looked perfectly set, only to realize they needed just a little more patience. With these bars, waiting a bit longer almost always improves the result.
Flavor Variations
Once you know the base recipe, it’s easy to change it slightly depending on the mood or season.
Dark Chocolate Peanut Butter Bars
Use dark chocolate chips for a richer, less sweet topping.
Crunchy Peanut Butter Bars
Swap creamy peanut butter for crunchy if you want more texture.
Sea Salt Chocolate Peanut Butter Bars
Add a light sprinkle of flaky sea salt on top of the melted chocolate before chilling.
Peanut Butter Pretzel Bars
Mix a few crushed pretzels into the base or sprinkle them over the topping for sweet-salty contrast.
Holiday Version
Add festive sprinkles on top for holiday dessert trays.
These variations keep the recipe flexible without changing the basic method.
How to Make Them Look Better for Serving
Simple no-bake bars can look surprisingly good with a few small touches.
Cut Clean Edges
Trim the outer edges if you want a more polished tray presentation.
Add a Light Chocolate Drizzle
A little extra melted chocolate on top can make them feel more decorative.
Sprinkle a Tiny Bit of Sea Salt
It adds visual texture and balances sweetness.
Stack Them Slightly
If serving on a plate or tray, stacking a few bars gives the presentation more height and makes them more Pinterest-friendly too.
These aren’t necessary, but they can make the bars feel a little more special if you’re serving guests.
Serving Ideas
These bars are rich, so they pair well with simple drinks and lighter sides.
Serve them with:
• coffee
• milk
• tea
• cold brew
• fresh fruit
They also work well on:
• dessert trays
• holiday platters
• lunchbox treats
• picnic desserts
• after-dinner snack plates
Because they don’t require reheating or last-minute prep, they’re especially practical for gatherings.
Storage & Reheating
These bars don’t need reheating, but proper storage matters.
Refrigerator
Store the bars in an airtight container in the refrigerator for up to 1 week.
Separate layers with parchment paper if stacking them.
Freezer
Freeze for up to 2 months in a sealed container.
Let them thaw in the refrigerator or at room temperature for a short time before serving.
Room Temperature
They can sit out briefly while serving, but they hold their shape best when chilled.
This is one of the reasons they’re such a good make-ahead dessert.
Nutrition Information (Approximate)
Per bar, depending on slice size:
Calories: 280–340 kcal
Carbohydrates: 28–34 g
Fat: 18–22 g
Protein: 4–6 g
These bars are definitely more of a treat than a daily snack, but that’s part of their appeal. They’re rich, satisfying, and meant to feel indulgent.
Frequently Asked Questions
Can I make these bars without graham cracker crumbs?
Yes. Crushed digestive biscuits or vanilla wafers can work as substitutes, though the flavor changes slightly.
Do no-bake chocolate peanut butter bars need to stay refrigerated?
Yes, they hold their shape and texture better when chilled.
Can I use natural peanut butter?
You can, but it may change the texture. Stir it very well first and expect a slightly softer result.
Why are my bars too soft?
This usually happens if the ingredient ratios are off or they haven’t chilled long enough.
Can I make them gluten-free?
Yes, as long as you use gluten-free graham cracker-style crumbs or another gluten-free crumb substitute.
Can I cut them into smaller pieces?
Absolutely. These bars are rich, so smaller squares often work very well for parties or dessert trays.
Final Thoughts
No-bake chocolate peanut butter bars are one of those desserts that make life easier. They don’t ask for much, but they still deliver something genuinely satisfying. The texture is soft and fudgy, the chocolate layer feels rich, and the peanut butter base makes every bite taste familiar and comforting.
They’re easy enough for an everyday sweet craving, but they also work beautifully for gatherings, holidays, or make-ahead dessert trays. And because the ingredients are simple, they’re the kind of recipe people actually repeat instead of saving and forgetting.
Some desserts impress with complexity. These impress because they’re uncomplicated, reliable, and just plain good.
Hi, I’m Sarah! I’m a home cook with a passion for healthy, feel-good food that actually tastes amazing. At Food Vibe Hub, I share simple recipes built around real ingredients — from high-protein breakfasts to easy everyday meals that fit into a busy life. Whether you’re meal prepping for the week or just looking for something delicious to make tonight, I’m here to make cooking feel a little easier and a lot more enjoyable.